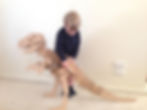
GIANT CARDBOARD/MDF DINOSAUR PUZZLE
- Admin
- Dec 30, 2013
- 3 min read
Updated: Jan 2, 2025
My eldest just had his 4th Birthday and this year we had a Dinosaur themed party. We had dinosaurs that you had to dig out of plaster, a Dinoland with a green slime lake, dinosaur fossil shortbread, 3D dinosaur gingerbread, dinosaur cupcakes, chocolate dinosaurs and a dinosaur volcano birthday cake. But I think my favourite (and the most time consuming!) thing for the party was a giant dinosaur puzzle "Dinopuzzle".

Dinopuzzle stands at 78cm high and is made from a combination of plywood and cardboard. It was made by enlarging a dinosaur woodcraft construction set that we had got for free. I thought it would be fun to blow it up on the printer to see how big we could get it. For the first attempt I just made it out of cardboard and it was 400% bigger which made it 53cm high. Then I thought it really needed to be bigger so it went from a A4 photocopy to an A3 one. I really really wish I could go to an A1 printer to get it bigger but I don't think I'll be aloud too because I have no idea where to store it!


For the party game, we hid the dinosaur parts/bones throughout the garden for the kids to find. Once they had found all the parts we had to work out how to put the puzzle together. It was a great party game that was fun for all the kids and something a little bit different to the old pin the tail on the donkey and pass the parcel games.

Materials used:
One very large double walled corrugated cardboard box.
3 sheets of 3mm plywood
Photocopier
A3 paper
Scissors
Marker Pen
Bluetac
Bandsaw
Rod and flat files
Bench drill (but Im sure you could just use a normal drill)
How I made it:
Glued plywood sheets on either side of the cardboard, 1 of the sheets I cut in half and used as 2.
I took the dinosaur woodcraft construction set and photocopied each peice enlarging it to the size I wanted.
Used a marker pen to define the lines and make nesarrary changes (eg slot sizes or shape)
Cut roughly around the pieces and blue tacked them down onto the plywood (this is like a puzzle itself trying to get them to fit on the plywood squares.
Cut them out with a bandsaw (Watch your fingers! Power saws always make me nervous so be extra careful)
Make sure that when you're cutting with the saw that the slots are the same size as the width of plywood/cardboard so the joints are nice and snug (the hip joints and spine are the most important).
I also used a rod file and flat file to get into the small corners and bench drill to cut out the eyes and head cavities.

Tips and Reflections
I wish I had given myself more time to make sure all the joints were the right size cos some of the joints were a little loose.
If you do have some loose joints you can just glue in some cardboard inserts to tighten them up.
I also am going to put in a little latch to hold the bottom and top of the spine together so you can pick it up and move it around once it's been constructed (I have been using an elastic band)
Make sure you use a simple design cos you don't want to make it too hard for yourself and you want it simple enough so the kids can work out how to put it together themselves (older kids should be able to work it out on their own)
Construct the small version first cos it will give you some idea of alterations you might want to make before building the final version ( I changed the face, jaw line, hands and feet).
I wanted to call it "Dinopuzzle" but the kids call it "Strawberry". Oh well in my head it's called "Dinopuzzle".
By Zygote Brown Designs
